Summary
When you upgrade to a new PC, you may choose to sell or trade in your old one. The hardware is gone, but what happens to all the apps and installers you may not have license keys for? Or that one program you configured years ago and never touched the settings on since? My solution was to convert the installation drive into a virtual disk file with Disk2VHD, then mount it in a virtual machine. This way I could set up a new PC from scratch while still keeping my old PC alive inside a resizable window on my new desktop. Before you start A free Microsoft tool and three things to sort out first The first step is turning your old PC’s hard drive into a virtual disk, and I use Disk2VHD. It’s a free, portable utility from Microsoft’s Sysinternals suite, so you don’t have to install anything. You download it, extract the ZIP, and run it. What makes it useful is that it works on a live system. It uses Windows’ Volume Shadow Copy Service to take a point-in-time snapshot of your volumes, which means you can clone the drive you’re currently booted into without a rescue USB or a reboot. Before you run anything, sort out three things:
- First, free up a destination drive. The output file can’t live on the volume you’re capturing if you want any real speed, so an external USB 3.0 SSD or a spare internal drive is ideal.
- Second, check how much space you need. Look at used space, not total drive capacity, then add about 10 GB of headroom.
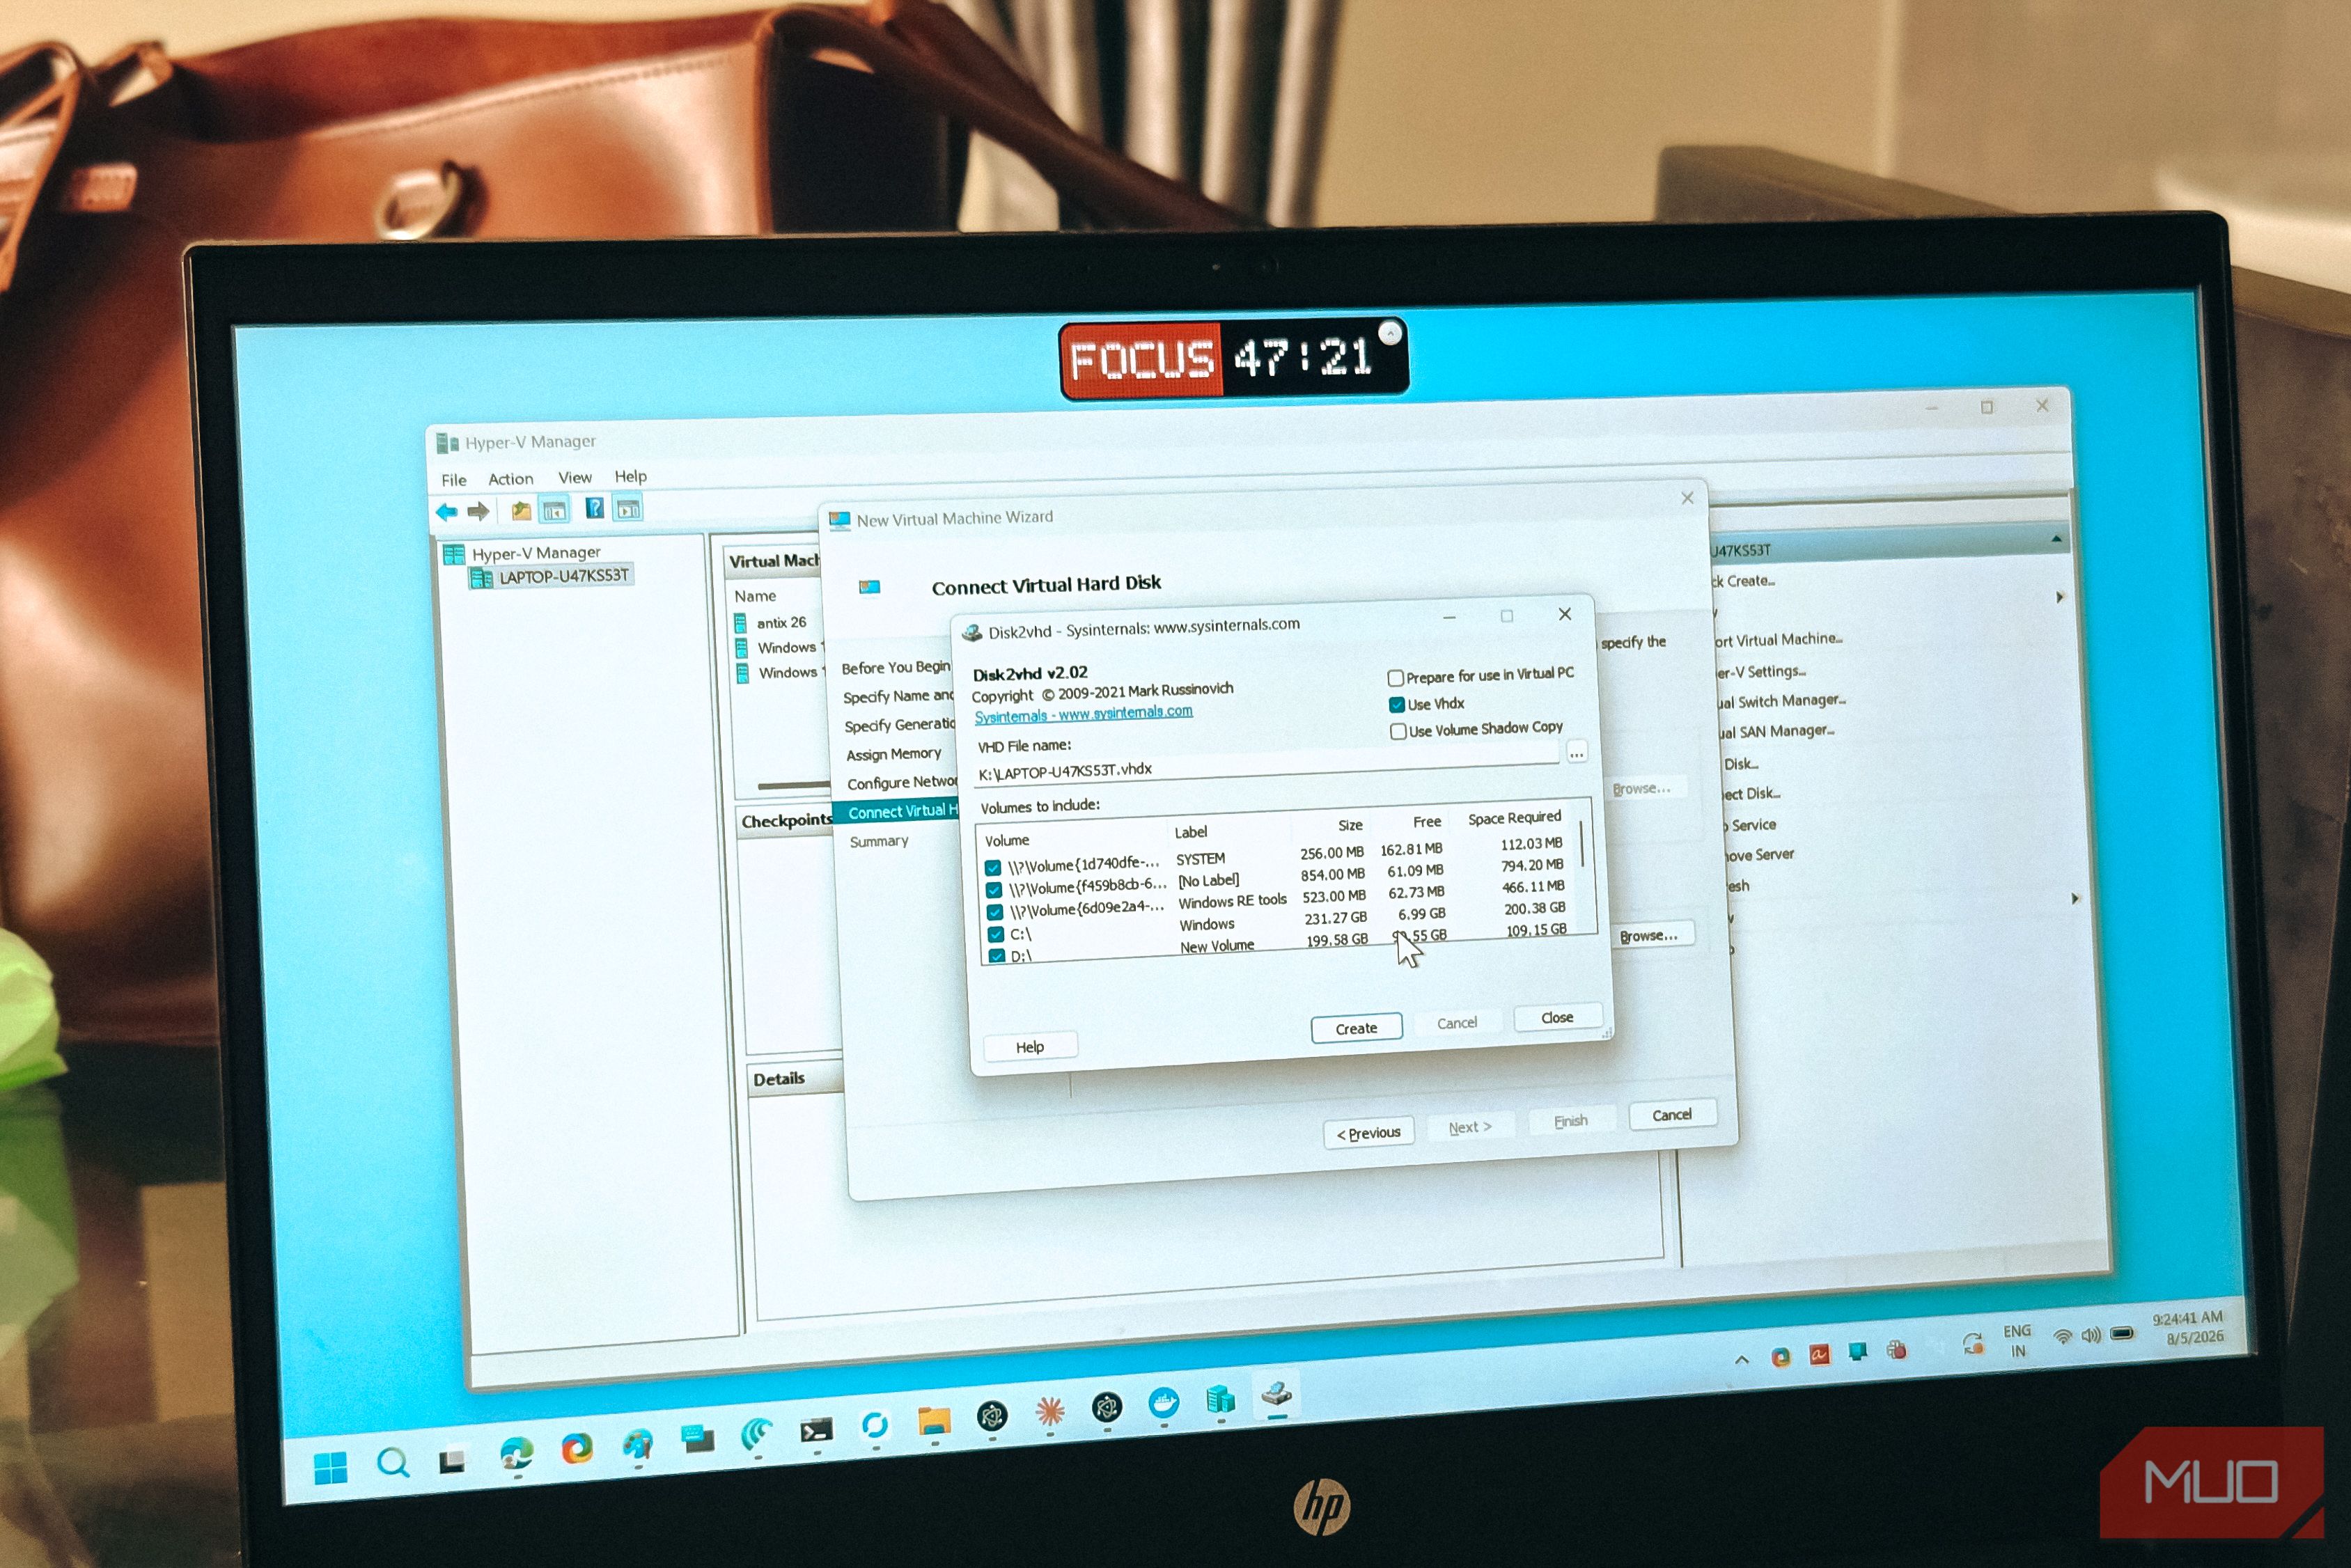
- Finally, turn off BitLocker if it’s on. Disk2VHD refuses to convert BitLocker-encrypted volumes, so head to Settings > Privacy & security > Device encryption, turn it off, and wait for the drive to fully decrypt. On a large drive, this can take hours, so start it the night before. It’s also worth quitting anything heavy like backup software, antivirus scans, or cloud sync apps before you begin. Fewer writes during the snapshot means a cleaner capture. Cloning your old drive into a virtual disk with Disk2VHD Creating the VHDX file while Windows is still running Download Disk2VHD from the Sysinternals page and extract the ZIP. Right-click the executable that matches your system (32-bit, 64-bit, or ARM builds) and choose Run as administrator. It needs elevated rights to talk to the Volume Shadow Copy Service; without them, the volume list may be incomplete, or the capture will fail partway through. In the app, click the three-dot menu next to VHD File name and point it to your external drive. Don’t save the output to “C: “if C: is what you’re capturing. Next, pick your volumes. Disk2VHD lists every mounted volume and ticks them all by default. For a bootable clone, you generally need the EFI System Partition, the Windows Recovery partition (if present), and your C: drive. Uncheck the USB drive you’re writing to and any data drives you don’t need. The Use VHDX checkbox is important. Leave it checked if you’re heading for Hyper-V, since VHDX is the newer format and more resilient to power loss. Uncheck it if you plan to use VirtualBox instead, which doesn’t read VHDX files. Leave Volume Shadow Copy enabled. That’s what lets the whole thing run against a live Windows install. Click Create and leave the machine alone. An SSD-to-SSD capture of around 90 GB takes roughly 20 to 40 minutes; a mechanical drive over USB 2.0 can run for several hours. The resulting file only reflects used space on the drive, not total capacity. My old 250 GB drive had about 90 GB of data, and the output file came in at roughly 88 GB. The virtual disk still reports the full 250 GB once you boot into it, but it won’t hog that much space on your new PC’s storage until you fill it up. Booting your old OS in a Hyper-V window Access both your old and new systems side by side Instead of rebooting every time you need something from the old setup, you can run it inside a window on your new PC using Hyper-V, Microsoft’s built-in hypervisor. Your old Windows boots in a resizable window, shares your internet connection, and sits there while you keep working on the new machine. Before you enable Hyper-V, check two things. First, your Windows edition. Hyper-V ships only with Windows Pro, Enterprise, and Education. If you’re on Home, VirtualBox is the cleaner alternative (though you’ll need a plain .vhd file, not VHDX). Second, confirm hardware virtualization is enabled. Open Task Manager, go to the Performance tab, click CPU, and look for Virtualization in the bottom-right. If it says Disabled, reboot into your UEFI/BIOS and enable Intel VT-x or AMD-V. To turn on Hyper-V, go to Control Panel > Programs > Turn Windows features on or off, check the Hyper-V box and both sub-items, then restart when prompted. The restart takes longer than usual because Windows is reconfiguring itself to run on top of the hypervisor.
- Now open Hyper-V Manager and click New > Virtual Machine.
- Name it something recognizable, choose the generation that matches your old PC (Generation 1 for legacy BIOS, Generation 2 for UEFI), and assign at least 4 GB of memory.
- On the hard disk step, choose Use an existing virtual hard disk and browse to the VHDX you made with Disk2VHD. Set the network to Default Switch, so the VM gets internet access through your host’s connection.
- Before you start the VM, right-click it and open Settings. Bump the virtual processors from 1 to at least 2.
- If you’re on a Generation 2 VM, either uncheck Enable Secure Boot or set the template to “Microsoft Windows,” as most captured installs fail to boot with the default template.
- Then double-click the VM to connect and click Start. Expect the first boot to be slow. Windows is discovering new virtual hardware and installing drivers for it, and it may restart once or twice. If it boots successfully, click View > Enhanced Session in the connection window for a better experience. The window resizes properly, clipboard copy-paste works between host and guest, and you can share drives and printers through the connection settings. You can also dual-boot into it natively Hyper-V works well for grabbing a file or checking an old program, but if you need the old setup running at full speed, you can boot the VHDX natively instead. This gives you full hardware speed instead of going through a virtualization layer, which is useful if the old install had programs that don’t run well inside a VM. Between the two approaches, running it in a Hyper-V window is more convenient for day-to-day access, and native dual-boot is there when you need the performance. Either way, the old PC keeps running long after the hardware is gone.